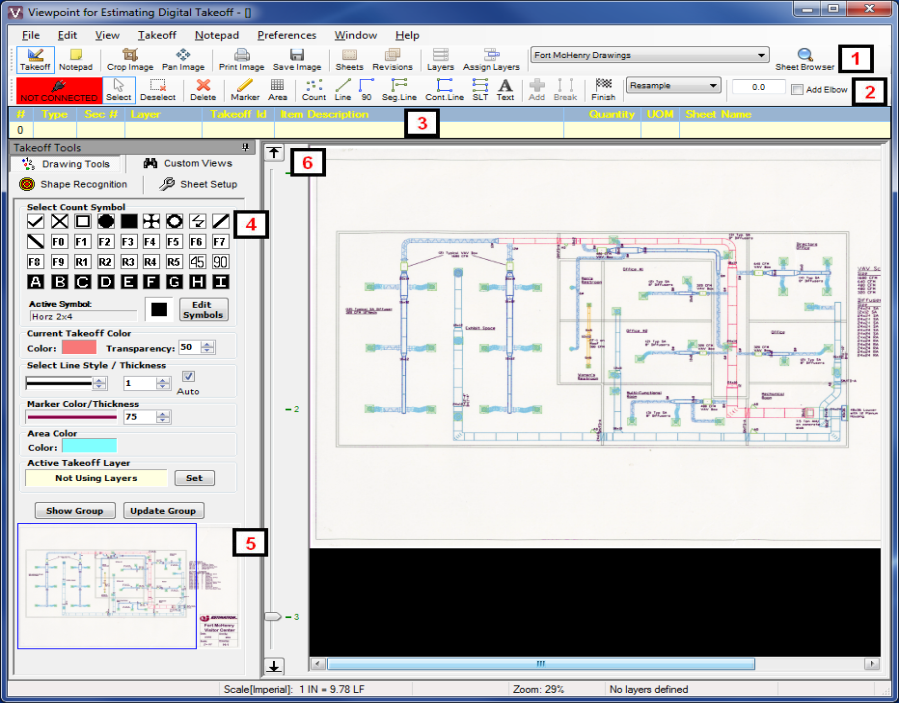
The Digital Takeoff screen is where you perform the actual takeoff. Here you add annotations to your Sheets and obtain measurements and quantities that are sent back to Standard Takeoff.
The Main Tool bar contains options that allow you to Print, switch between Takeoff and Notepad modes, access Layers, Crop, Pan and quickly switch between Sheets.
This is a secondary Tool bar which contains options associated with the particular mode you are in (Takeoff or Notepad). The icons in this Tool bar change depending on whether Takeoff or Notepad is selected in the Main Tool bar.
This contains information about the Annotations you have currently selected, including Takeoff number, Type, Section number, Takeoff ID, Item Description, Quantity, Unit of Measure, Segment Count, Drop Length, and Sheet Name.
The Takeoff Tools Panel allows you to initially setup your Sheet information, as well as Annotation styles. The Tool box panel also contains the Overview Panel. You can also access Custom Views, which allow you to create alternate views of the Sheet, which can be used as a reference during takeoff.
This is where you see an overhead view of the entire current Sheet. You can select an area on the Overview pane for display in the Main window.
The Main
window is where you digitize your plans. You can scroll and zoom within the Main
window, thus allowing you to change the window's focal point.
At the bottom of the Main window is the Status bar. The Status Bar displays
general information about the Sheet image, including the Scale
set, the Zoom
level, and the size of highlighted
Areas.