The Sheet Setup panel is used to set the scale of a Sheet. You must set the scale of a Sheet before you can use it with Digital Takeoff.
You can also override the scale for a drawing without having to compensate (see instructions below).
To access the Sheet Setup panel, click the Sheet Setup tab on the Toolbox panel.
NOTE: As of Estimating release 9.5, sheets are NOT shared among different applications (ie, HVAC and Mechanical) for the same job. For example, if a set of sheets are loaded in Job 123 Mechanical takeoff, if you open Job 123 on the HVAC side, there will be no sheets visible.
Estimating tracks where (what application) sheets are created. All new sheets will be tied to the current application (Mechanical, HVAC, Electrical) and will not appear in a different application.
It is possible to have two sheets with the same name loaded in one job, but they will be in different application estimates, so you are not able to see the other application's annotations.
All existing sheets (from previous versions of Estimating) will be visible in all three applications.
Sheet Name: Enter the name you want to assign to the Sheet. To change a sheet's name, type the new name into the field.
Notes: You can add any pertaining notes to the Sheet in this field.
Unit System: Choose to use Imperial or Metric for your Unit System.
Scale: This section of the panel displays the scale of the Sheet. Scale values will be in meters if Metric is selected under Unit System.
To Scale your Sheet:
Locate the longest line on your Sheet which has its length already recorded.
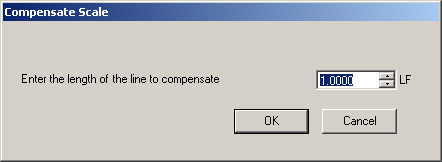
Click Start Compensate.
The Compensate Scale dialog will appear. Enter the length of the line (as shown on your Sheet).
Click
OK. You will be
prompted to digitize the line itself, from end to end.
Note: For best results, zoom as close as you can on the
line you are compensating.
After you have digitized the two ends of the line, Digital Takeoff will display the results in the Scale section of the Takeoff Tools panel.
Click OK.
To Override the scale for a drawing without having to compensate:
Click Override Compensation.
On the Manually Compensate Sheet window, select the predefined type of scale you are using (Manual, Architectural, or Engineering).
Use the drop down to select the scale of measurement needed.

Select I Agree to accept the value or Cancel to exit without changing the scale. The scale used is displayed in the Scale section of the Sheet Setup window.
Changing the scale of a sheet:
If the sheet has annotations on it, you will get confirmation prompts/warnings:
If you want to change the scale of a sheet with linked annotations and you are not connected to Takeoff, a warning message will display.
If you proceed to change the scale without being linked to Takeoff, differing quantities in Takeoff and Digital Takeoff will result. This is not recommended.