There are several options that you can set in Takeoff that control how takeoff is carried out. These include Takeoff Menu, Size, Formula, Quantity, and more. There are three ways to change Takeoff options:
From the Open Section window upon entering Takeoff,
Directly in the Takeoff window, with Options displayed, or
By selecting File > Options > Takeoff Options in the Takeoff window.
Manage Options By:
Select the option that you want to use to manage your takeoff:
Section
Installation Codes
Drawings by Sheet
Building Number
Floors of Building or
Alternates
When you select the Manage Option By criteria, that criteria will be "locked" in the Levels section of the window. The message "Managed Level types cannot be edited" will display in the appropriate field.
Note: The drop-down list under "Manage Options By" can be used to select a Level Type to use when managing options (instead of a Section). If no options are defaulted for the Level Type, the options for the active section will be used. When making changes to Level Type options, your changes will only apply to sections that have not yet been entered in Takeoff. If Section options are not defined and have not been entered, the Job/Estimate defaults are used when entering Takeoff.
Retain Active Levels Between Sections:
When checked, the Retain Active Levels Between Sections option will cause any Levels that have been marked as active to carry over when you switch Sections.
Select the options for:
Menu:
Modify this selection to choose the default Takeoff Menu. Select a Takeoff
Menu by using the ![]() to display a drop-down
menu. Use
to display a drop-down
menu. Use ![]() and
and ![]() to scroll
through the Menu descriptions. Select the Takeoff Menu you want to use
by highlighting it. The screen is updated with your selection.
to scroll
through the Menu descriptions. Select the Takeoff Menu you want to use
by highlighting it. The screen is updated with your selection.
Size:
Modify this selection to choose the default Size of an item by using the
![]() to display a drop-down menu. Use
to display a drop-down menu. Use ![]() and
and ![]() to scroll through
the different sizes. Select the Size you want to use by highlighting it.
The screen is updated with your selection.
to scroll through
the different sizes. Select the Size you want to use by highlighting it.
The screen is updated with your selection.
Formula:
You may use one of your pre-defined formulas to calculate quantity, instead
of entering the quantity. A formula uses the dimensions that are set to
calculate the correct quantity. If any of the dimensions needed by the
formula are set to 0, the program prompts you to enter values for them
during Takeoff. Select a Formula by using ![]() to
display a drop-down menu. Use
to
display a drop-down menu. Use ![]() and
and
![]() to scroll through the Formulas. Select the
Formula you want to use. The screen is updated with your selection.
to scroll through the Formulas. Select the
Formula you want to use. The screen is updated with your selection.
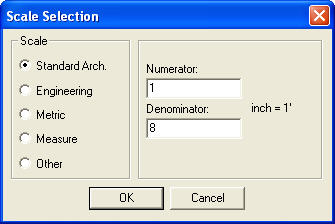
Select Scale... to open the Scale Selection window. Estimating uses the scale setting to translate entries made using the Distance Wheel on the Probe or using the Stylus with the Digitizer. A numeric entry can be made using either the PowerPad or the Probe. The program takes any entry by the Count button as a numeric (or "literal") entry, but an entry by the Distance Wheel is assumed to be a scale entry. Make your selections and click OK. See Scale for more detail.
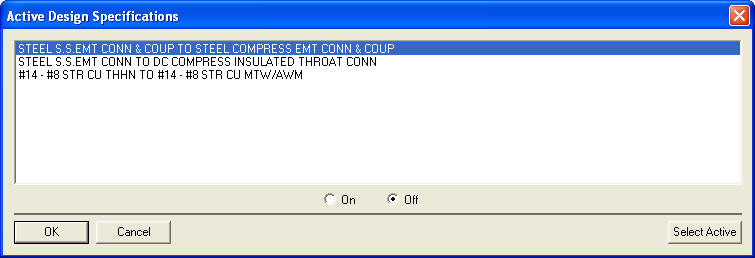
Select the Design Specs... to open the Design Specifications file. See Setting Design Specifications Active Prior to Takeoff.
Enter:
Quantity: An item will be taken off at this default quantity, to change the Quantity, simply type in a new value in the Quantity field.
Multiplier: The Multiplier field allows you to enter a number that will multiply all quantities taken off.
Material Factor: This is the default value for the Material Factor. When adding or editing an item, unless a Material Factor is specified in the Factors drop-down menu, the Material Factor set here will be applied to the item.
Labor Factor: This is the default value for the Labor Factor. When adding or editing an item, unless a Labor Factor is specified in the Factors drop-down menu, the Labor Factor set here will be applied to the item.
If you mark the Auto check box, your entry for that factor will be the default in Takeoff (if you change the value in Takeoff, it will return to this default after the next Takeoff entry). When Auto-Default is on, the value is shown in red in the Options display in Takeoff. If Auto is unmarked, the factor will remain at its setting in Takeoff until you change it.
When Deduct check box is selected, everything you take off is subtracted from the Estimate. This feature is used primarily to correct mistakes in takeoff. When Deduct is checked, "DEDUCT: ON" is indicated in red on the right side of the Takeoff screen (under Levels).
In the Levels section, identify the levels to be used for this takeoff. Slots are managed individually for each management type.
Use Restore Defaults to reset the current level's settings to match those of the main slot (the Manage Options By field at the top of the screen).
Use Undo Changes to remove any changes made.
Select Apply to apply the changes.
Select OK to apply the changes and continue to the Takeoff window.
Use Cancel to exit the Takeoff Options screen without saving any changes. Any changes made will not be saved, unless you selected Apply before cancelling.