These instructions assume printing of the entire Summary file with all of the default fields of information. Although these instructions use the Summary folder as an example, the same printing procedures apply when printing Subtotals or Phases.
1. Select the level at which you want the printed report to begin. Select your level by highlighting it in the side bar.
Note: The selected (highlighted) level (and optionally, its sub-levels) is the extent of the Summary file that will be included in the report. You don't have to print the entire Summary file.
2. Select File | Print or ![]() . The Print Report window displays.
. The Print Report window displays.
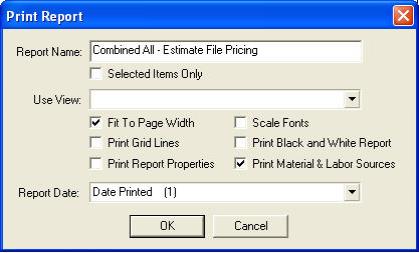
3. This window controls the view and items that will be included in this report.
In the Report Name field, you can change the name of the report if desired.
Use the Selected Items Only checkbox if you wish to only print the items you have selected (highlighted) on the screen. If you leave the box un-checked, the entire report will print.
Use View field, select the view you want to use using the drop down arrow. If a view is not selected, the current view (shown in Summary) is used.
Check the printing options you need: Fit to Page Width, Scale Fonts, etc.
In the Report Date field, select the date you want to use on your report by selecting the appropriate option from the drop down selections.
|
Notes:
|
4. When you have made your selections, select OK to print the report.