Open topic with navigation
Customize Symbols
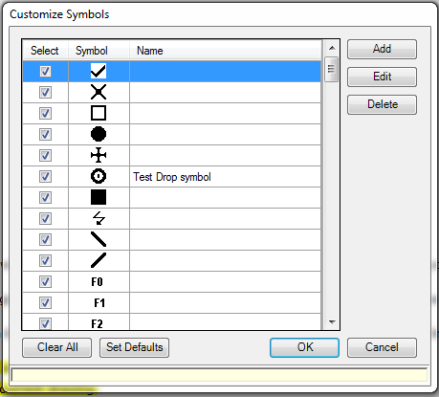
This window allows you to customize (add, edit, delete
and select) which annotation symbols appear on the Drawing
Tools panel. To access the Customize Symbols window, double-click
the Active Symbol box.
To select the symbols you wish to use, either check
or un-check the Select box by each symbol. You must have 36 of the 130
symbols selected for use before you can exit the window.
- To
select the symbols you wish to use, either check or un-check the Select
box to the left of each symbol. You must have 36 of the available
symbols selected for use before you can exit the window. These selected
symbols will be visible in the palette as your count symbols.
- Select
Add to create a new symbol.
- To
edit a symbol, highlight the item and select Edit.
- To
delete a symbol, highlight the item and select Delete.
- On
the Add Symbol (or Edit Symbol) dialog, use the mouse to "draw"
with the cursor to fill in blocks to create, or edit, your symbol.
The left mouse button will draw pixels, and the right-mouse button
will erase pixels. You can also hold either mouse button down
and drag the mouse around to draw or erase multiple pixels.

- Enter
a name for the symbol.
- Select:
- Selected:
When checked, the symbol is added to the Digital Takeoff Tools Palette.
- Remember
Size Across All Sheets: when checked,
the symbol's current size will be used across all sheets and jobs.
- Select
OK to save. The new symbol
is added to the Select Symbol list.
Clear All:
This option de-selects every symbol in the window.
Select Top Symbols:
This option sets the currently selected 36 symbols as your default
list. Those symbols will be use whenever a new Job is created.
OK: This
option applies the changes made to your symbols list, updating the Drawing
Tools panel with your choices (must have 36 symbols selected).
Cancel: Returns
you to the Drawing Tools panel while retaining the original settings.
© 2019 Trimble, Inc. All Rights Reserved. See more at www.trimble.com.Trimble Privacy Notice