Open topic with navigation
You are here: Exporting to ProContractor > Setup > Setting up the ProContractor Bid
Setting Up the ProContractor Bid
When you are ready to export your information to ProContractor,
go to Summary and select New Acct Bid
from the Open Summary window.
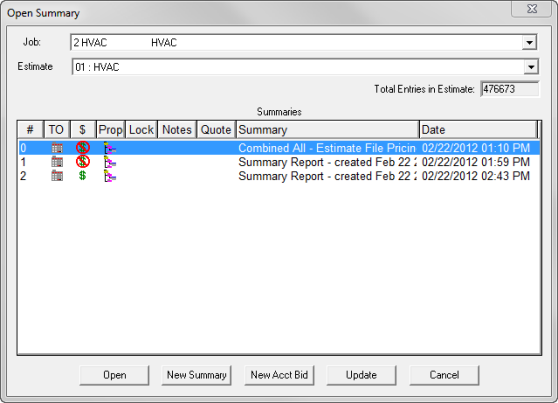
Note: If
the New Acct Bid option is not
visible, make sure you have configured Estimating correctly using the
General Options.
The ProContractor integration must be activated in the Accounting Integration
tab. Go to File > Options > General
Options, select ProContractor in the Application section.
The Properties window for the Bid Export Report will
display:
This window has several tabs with settings for the
Bid Export Report.
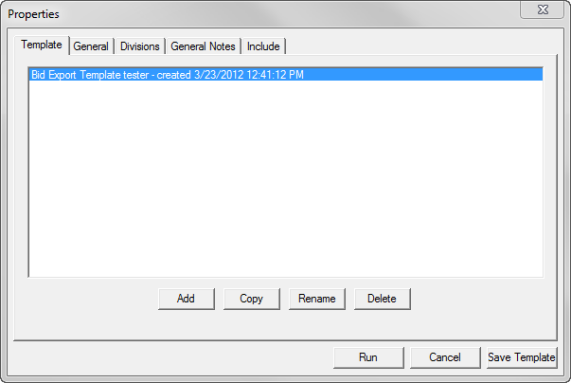
 Template Tab
The Templates tab allows you to save Bid Export
Report setting configurations that can then be selected for future
Bid Export Reports involving the loaded Estimate.
ADD: Use
to add a setting template to the window. When a saved template is
highlighted, the settings of the Properties window are changed to
how they were configured when the template was added. In addition,
any selected Default Items will be added into the Bid Export Report.
COPY: Use
the Copy feature to copy the selected bid export template within the
current bid or to copy the bid export template to another data set
or another estimate. Follow the prompts on the Open Summary window
to select where you want to copy the bid export template to: Data
Set or Estimate.
Note: Remember to rename your copy to a descriptive name that suits
your needs.
RENAME:
Allows the user the rename the selected template.
DELETE:
Deletes the selected template.
Note: Templates
for Bid Export Reports can also be configured by going to Data > Data File Maintenance
> Bid Export Templates or Estimate
> Estimate File Maintenance > Bid Export Templates. Templates
created through Data File Maintenance will be available for all new
Estimates, while those created through Estimate File Maintenance will
only be available for the Estimate being modified.
When accessed through the above methods, the Template
tab will feature an additional option: View Default Items.
VIEW DEFAULT ITEMS:
This option will open an empty Bid Export Report screen. Users
can then takeoff default items which are added to the report when
it is run. The Default Items screen functions just like a regular
Bid Export Report. However, you cannot actually create a bid file.
General
Tab
The General tab contains general settings for the
Bid Export Report.
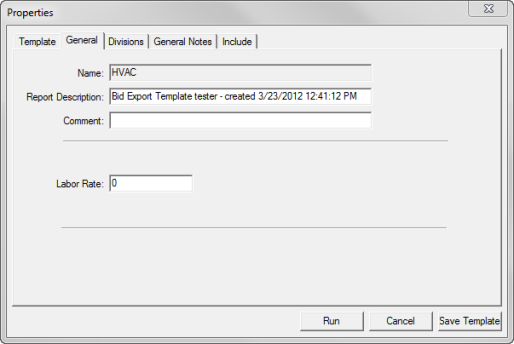
NAME: By
default, this field is set to the name of the Job. It can be
modified if desired.
REPORT DESCRIPTION:
A brief description of the Bid Export Report. If a template
is selected, its name will be automatically entered into the field.
COMMENT:
Comments on the Bid Export Report can be entered in this field.
LABOR RATE:
Enter in the value for the Labor Rate.
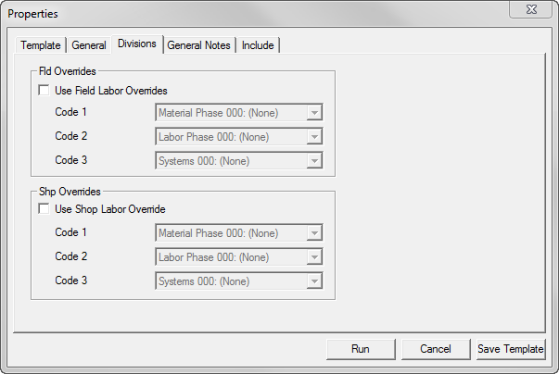
Divisions
Tab
In the Divisions
tab, you can specify
overrides for the codes used in Bid Exports for Field Labor and Shop
Labor cost type items.
NOTE: To effectively
use this feature, you must have “Create Separate Material and Labor
Items” checked in the Accounting Integration section of your Summary
Preferences. If this box not checked, items that contain both
Material and Labor values will appear as Cost Type “Material” and
your overrides selected here will not be applied.
Check
the box next to Use Field Labor Overrides.
Then use the drop down arrow next to each Code field to select the
code you want used in the report.
Check the box next toUse
Shop Labor Overrides.
Then use the drop down arrow next to each Code field to select the
code you want used in the report.
The Code 1, 2 and 3 entries correspond to
the codes selected in the General Options Accounting
Integration tab.
General
Notes Tab
This tab provides a place to store notes regarding
the Bid Export Report.
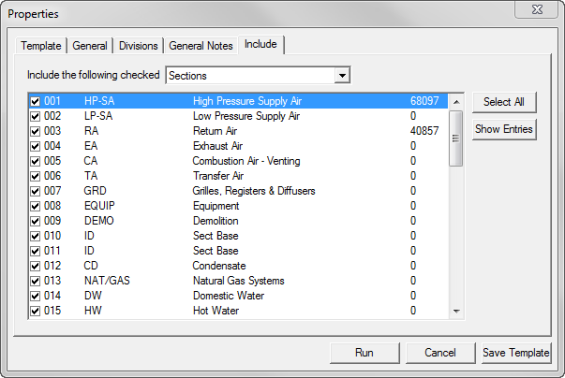
Include
Tab
This tab allows you to specify which Takeoff Sections
you want included in the Bid export file. To select/deselect
a Section, click on the box by the Section’s name. By default, all
Sections are initially selected. In addition, you can use Select
All to quickly select all the available Sections.
You can also filter what is included in the report
by any of the six user-defined levels or by Sections. To do so, use
the drop-down menu beside Include
the following checked. You can also use Show
Entries to display the number of items in any particular Section
or user-defined level filtered.
Once you are finished setting-up the Bid Export Report
options, use one of the following options:
RUN: Will run,
and then open, the Bid Export Report with the current settings.
CANCEL: Cancels
the Bid Export Report setup.
SAVE TEMPLATE:
If a Template is selected, using this option will save/update the
settings stored in the entry.
Note: Many
of these Properties can be adjusted within the Bid Export Report by using
the Edit
> Reallocate Profit and Overhead menu option.
© 2016 Viewpoint, Inc.
Construction Specific Software that Integrates
www.viewpoint.com
For support on the Web (and Online Support Chat), visit
ClearView.